
Doll Finder
Advertisement
Adding to the Doll Canvas
this page is messy. im sorry.
Adding images to the doll canvas requires attention to detail and a specific set of instructions to keep doll sizing consistent. You will need to download the sizing chart below, print it, and tape it together.
If you’re unable to crop or edit your photos, I can do it for you. Just upload your images as usual and leave a note in the notes section.
Do NOT use recast dolls. They are not the same size as legitimate dolls and are often smaller with inconsistent measurements!
*Optimized for US Letter (8.5" x 11"). Can be printed on A4, but side margins will be narrower and some side clipping may occur.
What you will need:
- Camera (your phone is fine)
- A tripod (to keep photos consistent while rotating the doll)
- The printed scale chart (click the button to download)
- A metric ruler (for centimeters)
- Tape, glue, or a stapler....paperclips?
- A clear, well-lit workspace/wall
- The nude doll (no wigs, clothing, or accessories)
Photos required:
- 1 photo of the front of the doll
- 1 photo of the side of the doll
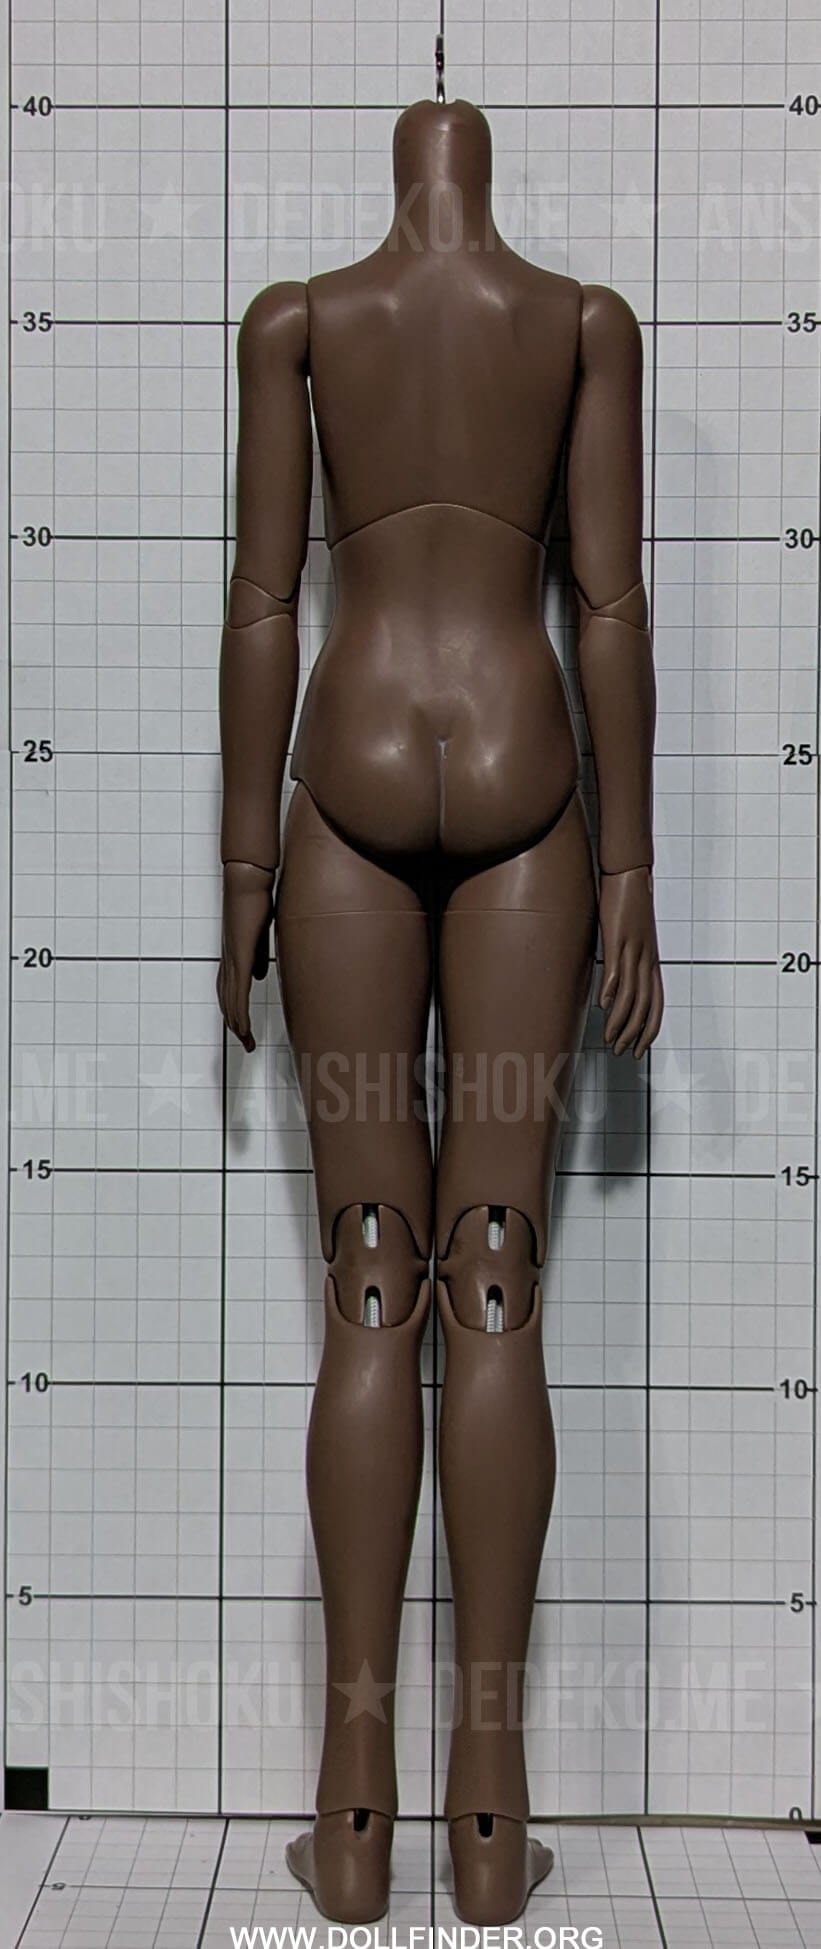
- 1 photo of the back of the doll
Video Tutorials:
Coming soon! For the visual learners, I gotchu!
Printing & Calibration Steps
Step 1
Isolate Page 1 for Testing
- Open the PDF file and select Print. You can use your web browser to open the PDF.
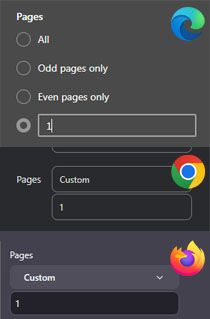
- Look for the dialog box in your printer settings that asks what pages you wish to print. By default, it should read something like Pages: 1-5, or "All".
- Clear that text box out and type 1 so you only print the very first sheet.
Step 2
Verify Printer Settings
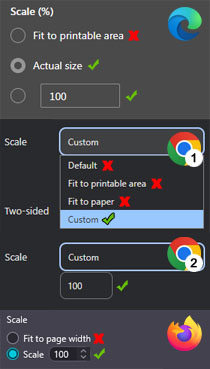
- Look for the Page Sizing & Handling section.
- Make sure Actual Size or Custom Scale: 100% is selected.
- Ensure "Shrink to printable area" or "Fit to page" is completely unchecked. These settings will cause the grid to print smaller and distort the measurements!
Step 3
Checking scale accuracy
- Print that single first page. If the "clipping may occur" message pops up, click "okay" and proceed to print anyway.
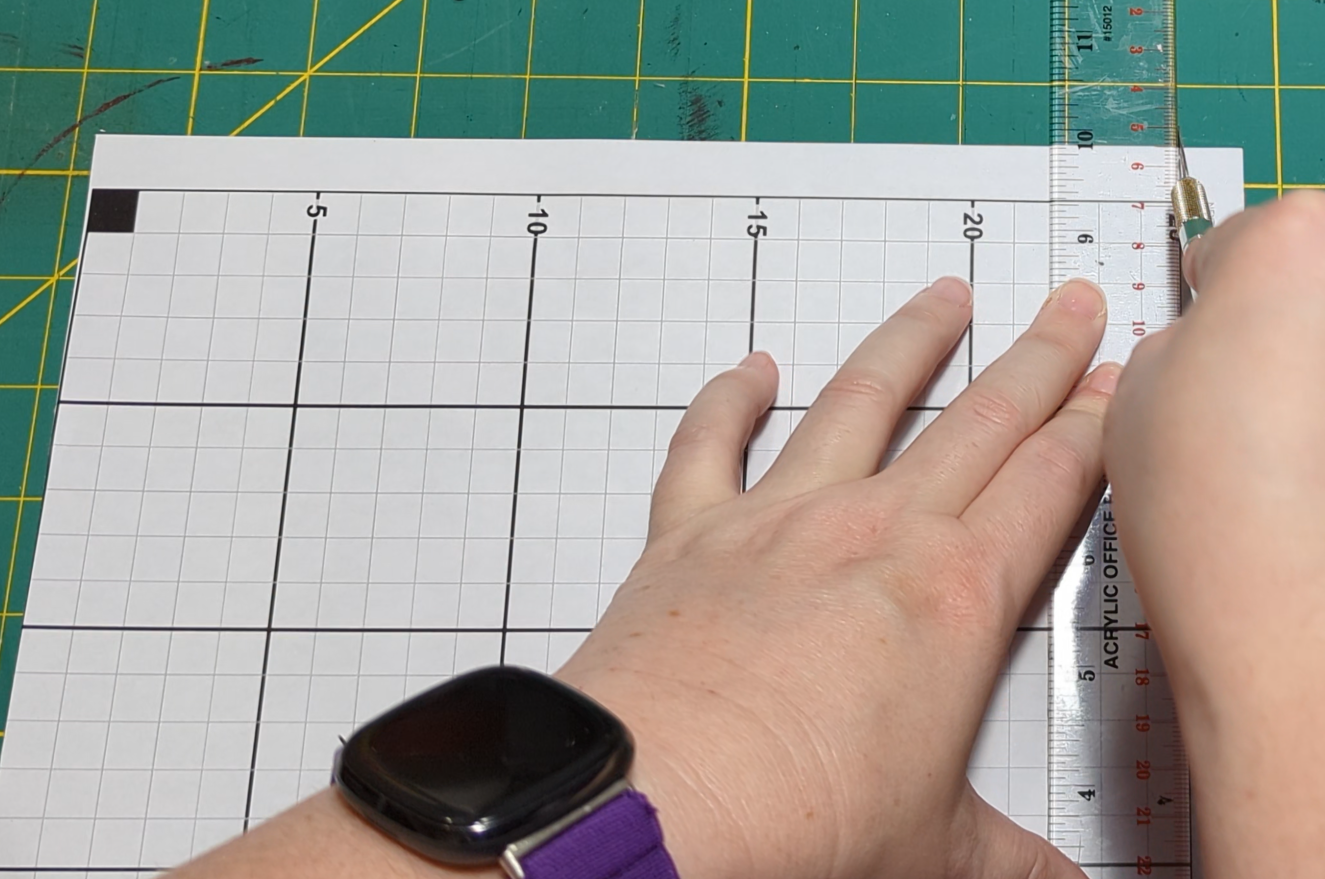
- Take a physical metric ruler and measure a 5cm section.
- If it matches perfectly, go ahead and print the remaining pages (2-5) using those exact same settings!
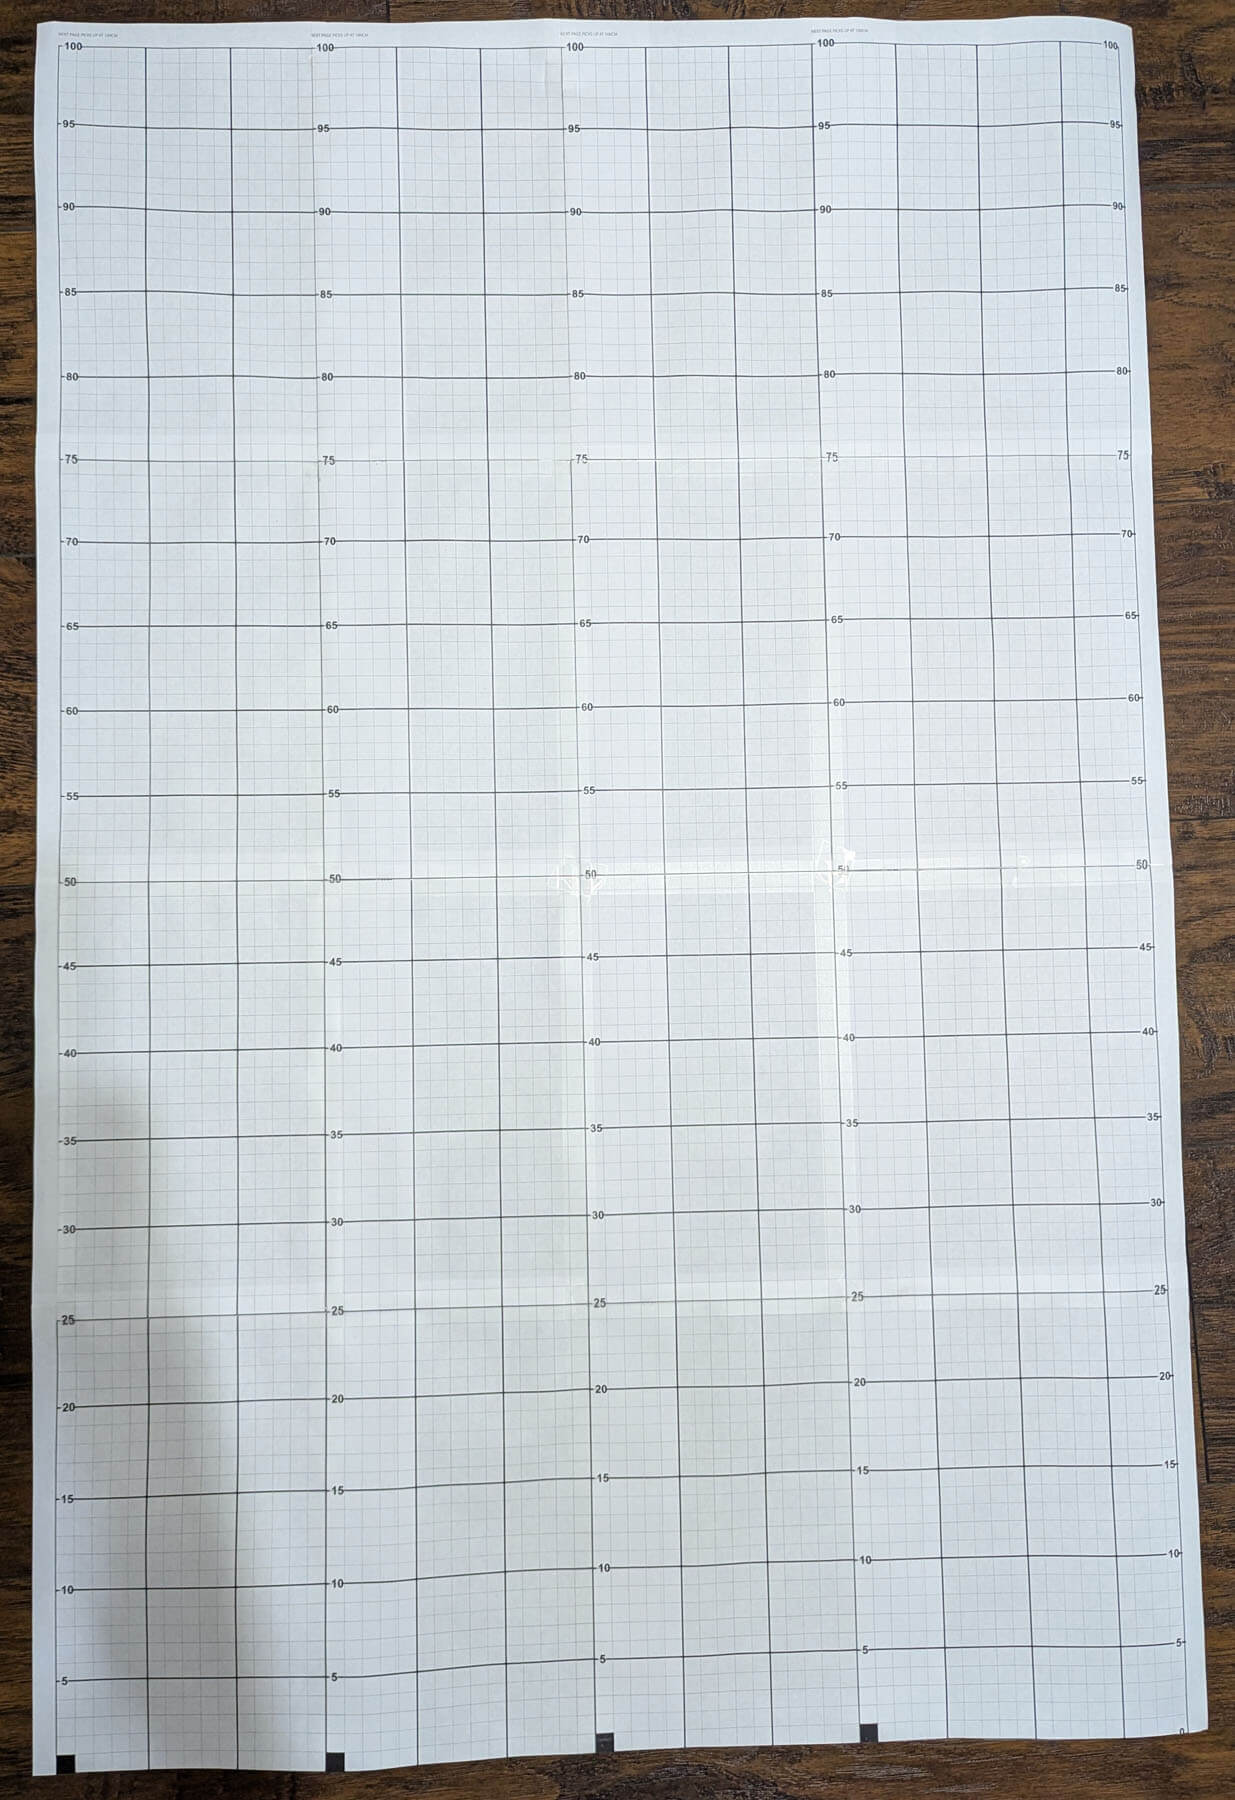
A Quick Note on the Grid & Accuracy: Please ensure your background grid is set to 1cm squares with bold 5cm sections. Due to varying line widths, you might notice small measurement discrepancies, but these should never exceed 0.5mm.
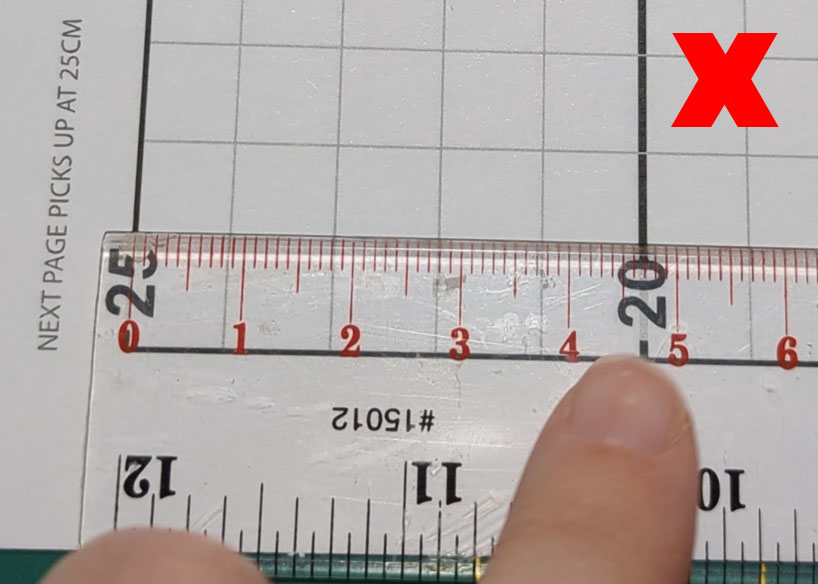
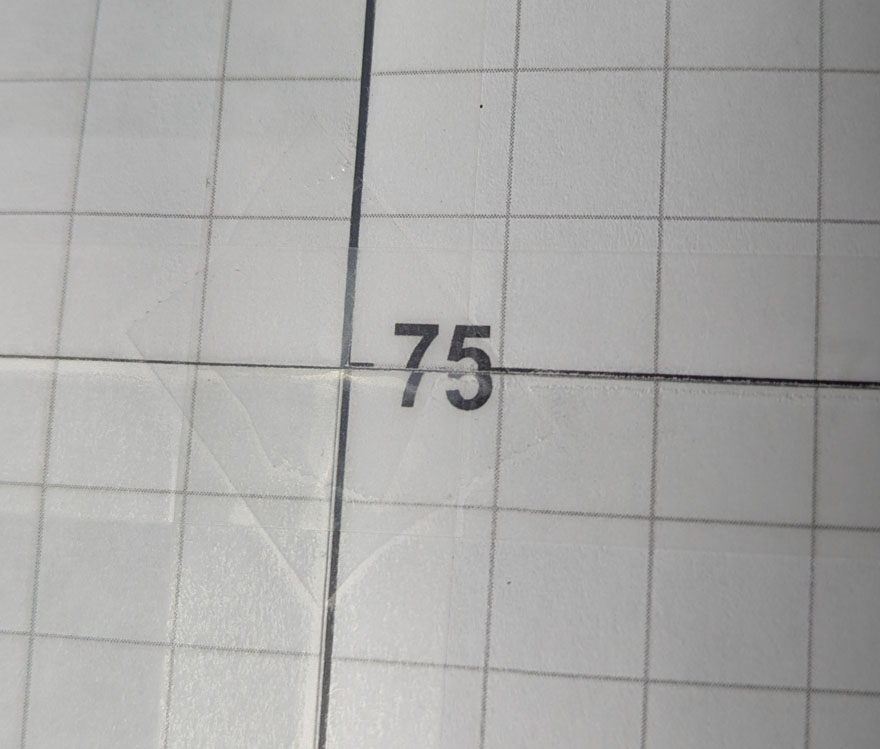
Measurements are not 5cm apart. Check your print settings.
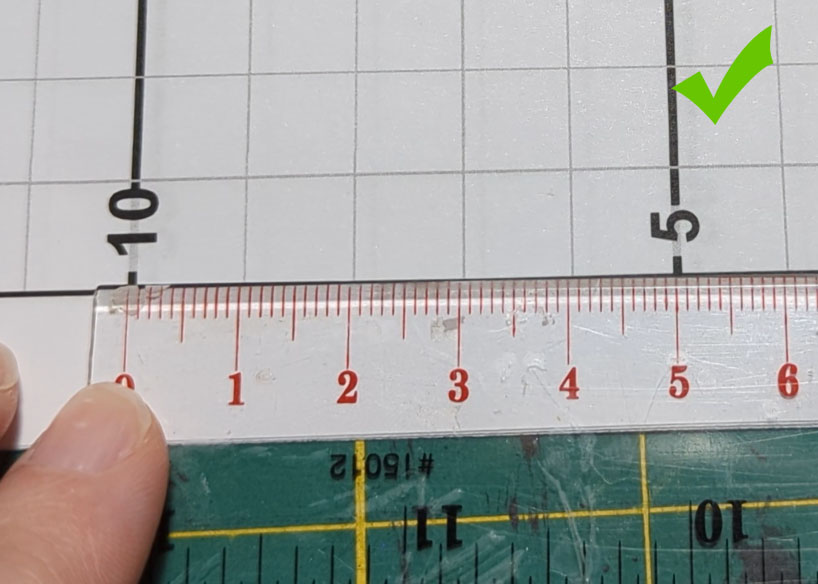
Measurements are 5cm apart, so the grid printed correctly! Check a different section to be sure!
Printing Notes
Please note that larger dolls are often much wider than smaller dolls. You may need to print an additional set of grid pages, or at least extra measurement sections up to 50-75 cm, to accommodate dolls with broad shoulders. For very large dolls, such as the 120 cm Conarium girls, an extra set is practically required. If you need a larger scale, please contact me, and I will be more than happy to provide you with sheets that go beyond 125cm. Those dolls do exist!
Personally, I printed four sets and taped them together. My collection includes a wide variety of dolls, including centaurs and 100 cm snake-bodied dolls. Some of these, especially the centaurs, are quite wide when viewed from the side, so a grid that is only one sheet wide would not provide enough space.
Since I took the time to assemble the grid carefully, I can simply roll it up and store it away when I'm done. The next time I need to photograph a doll, I just unroll it and it's ready to use again. 🙂
Assembling the Grid
Step 1
- Cut the top and bottom off the first page. Use a ruler or straight edge for more accurate cuts.
This is so that the bottom of the page sits flush with the tabletop or floor.
Step 2
- Cut the top off pages 2-5.
The reason for leaving the bottom on the pages is so that you have something to glue or tape the other pages too.
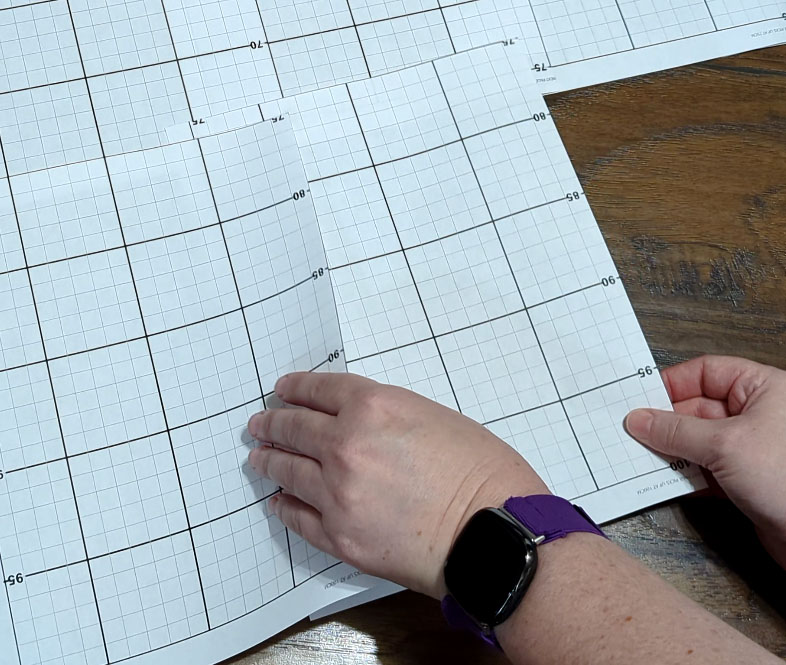
Step 3
- Line up the lines as best you can and tape or glue them together. Don't worry if the top and bottom numbers don't match up well. It's the line that matters.
The top-most measurement is printed on the bottom of the next page to help you line everything up.
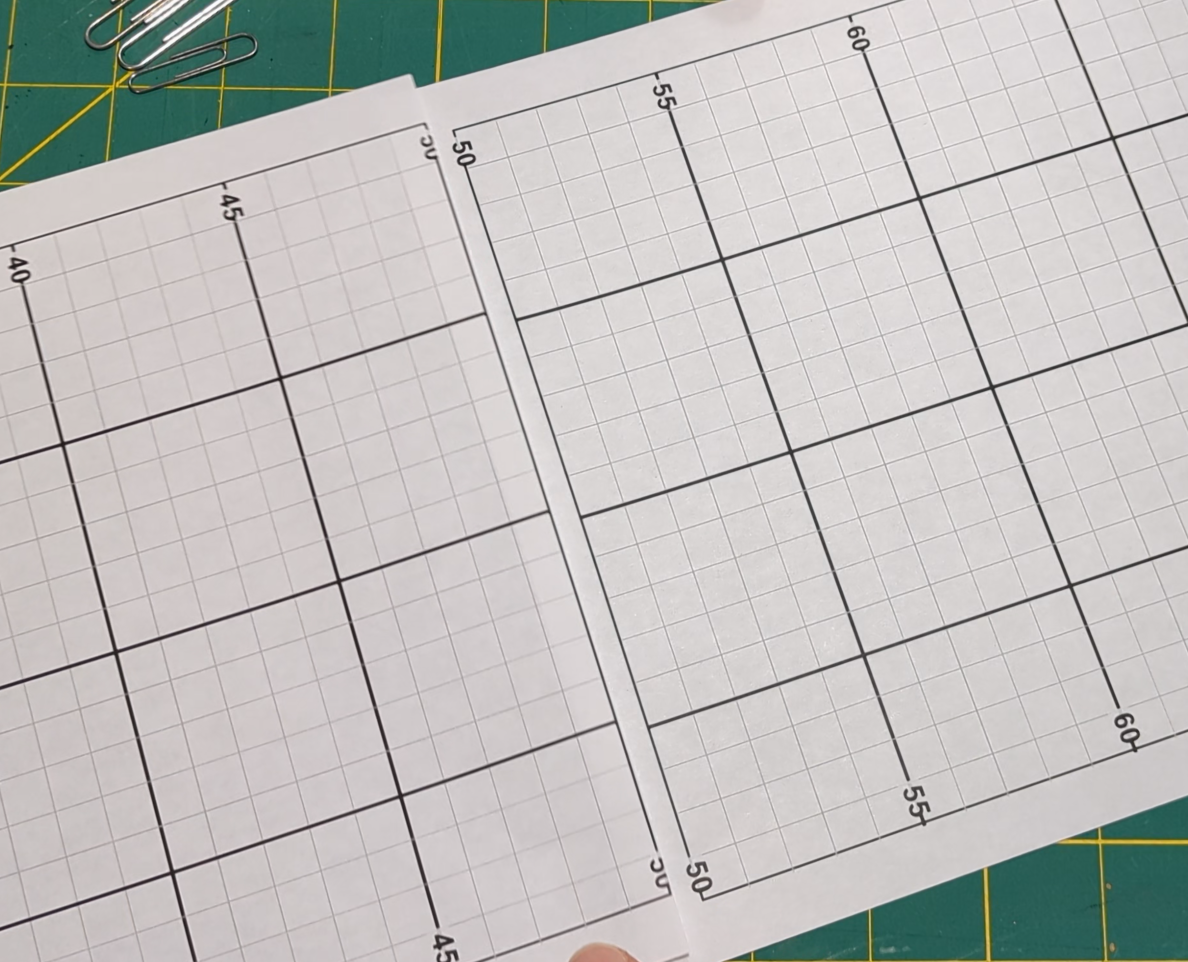
It is okay if the numbers don't match up, just make sure the lines do!
Multi-width Assembly
If you decide to build a wider grid, be sure to pay close attention to the rightmost column. It is only 4 cm wide, not 5. Use this 4 cm section to align the edge with the third column of the next page. This also provides a built-in overlap area for gluing or taping the pages together.
For a multi-width grid, I also cut off the bottom and left margins. See images below. Please note that I was doing the last row, so the grid is upside down.
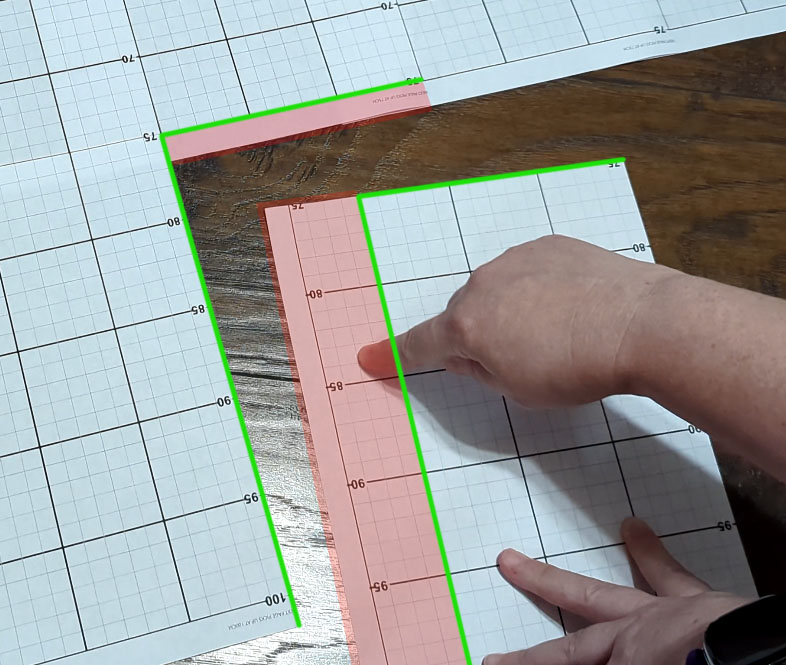
Tuck the red parts under so that the green lines come together.
It can be challenging to align multiple X and Y axis lines accurately. Use slow, micro adjustments rather than large movements to fine-tune the alignment.
Setting up the Grid
Now you need a blank wall to attach the backdrop to. A wall is recommended because it also allows you to gently lean the doll against it if it has trouble standing.
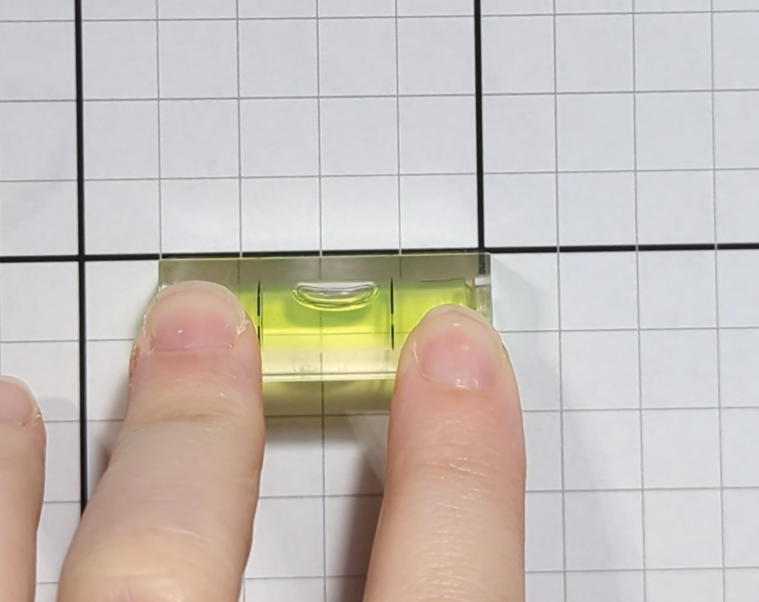
I also used a level to make sure the measurement grid was perfectly vertical and not crooked. Keeping the grid straight is important for accurate measurements. It doesn’t need to be absolutely perfect, but the more care you take with the setup, the more reliable your results will be.
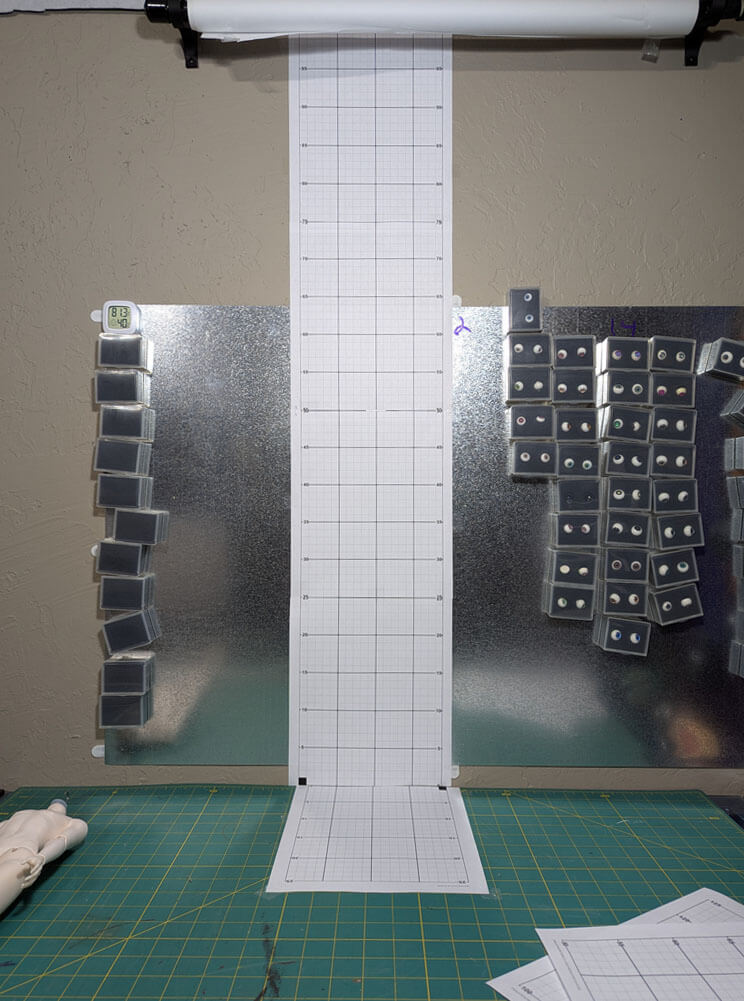
Example of a one set doll scale. The page on the table surface is optional.
Example of a multi-set doll scale designed for wider and larger dolls.
Prepare your doll:
- Grab the doll/doll head/part you would like to photograph.
- Remove the wig and or wig cap.
- Remove all clothes and accessories, including underwear, shoes, bracelets, etc. Glue on piercings are fine. The doll must be completely bare.
- Actually measure your doll! You will want the doll in the image to match the physical measurements. See examples.
See the example photo. The doll is completely bare.
It is okay if your doll has a faceup or has body blushing.
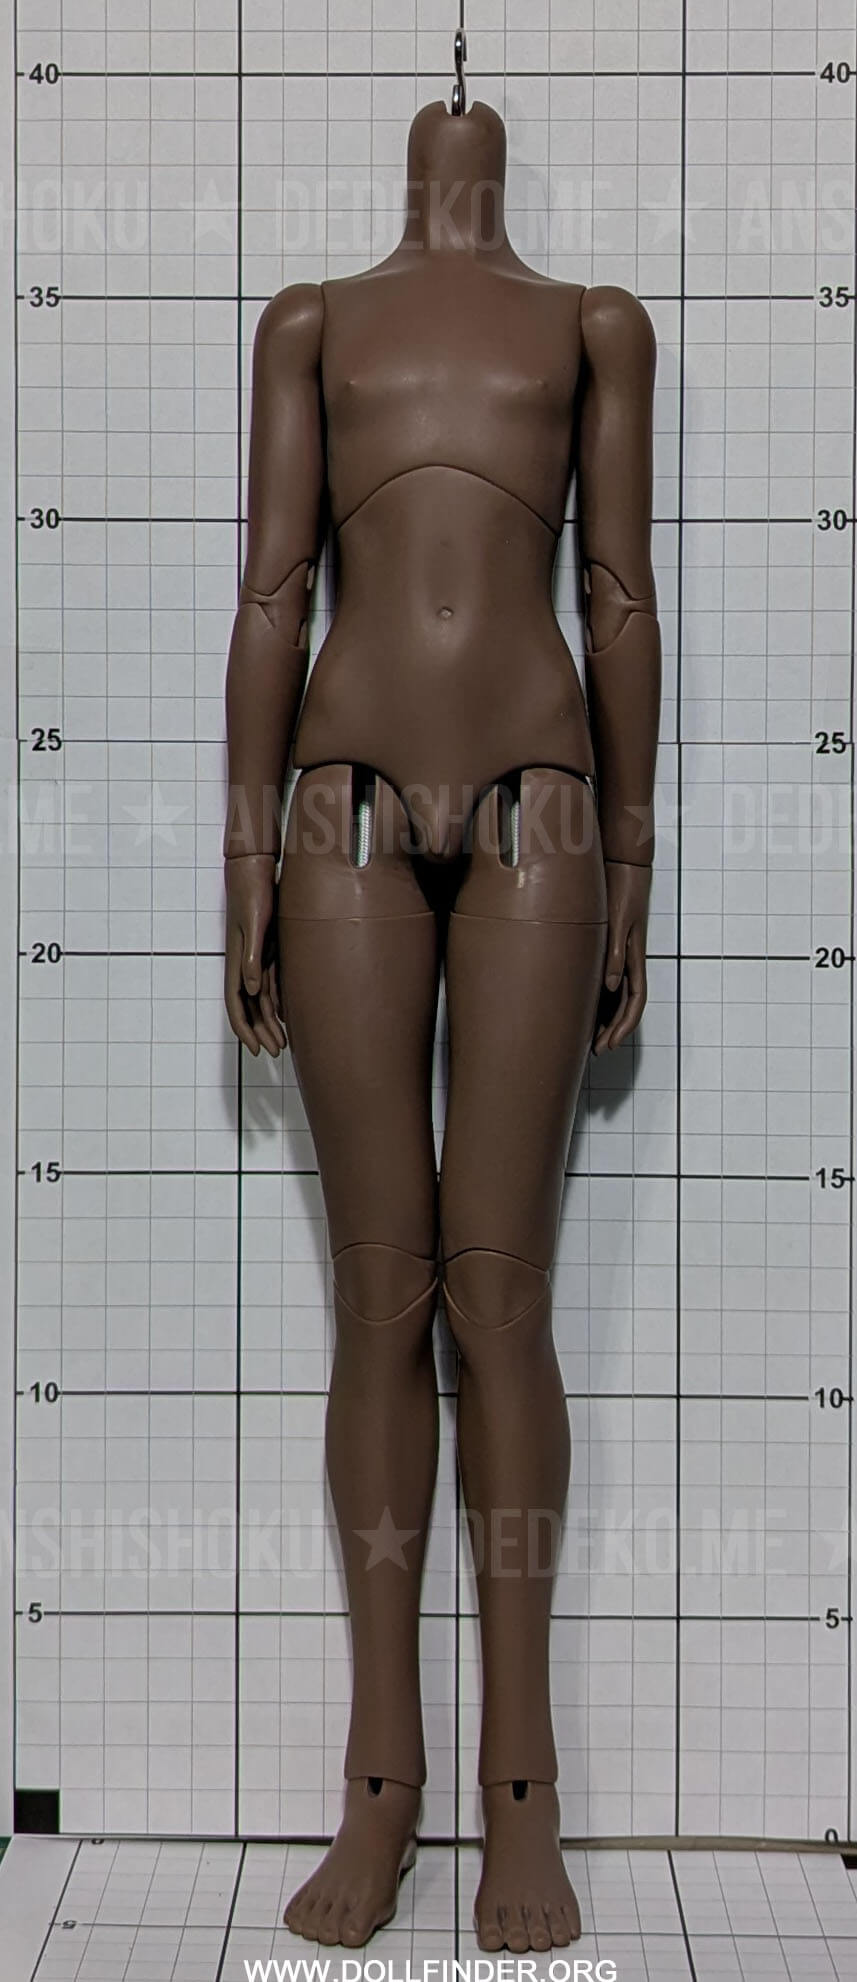
The body is actually 39cm as you see in the image. The camera angle was spot on.
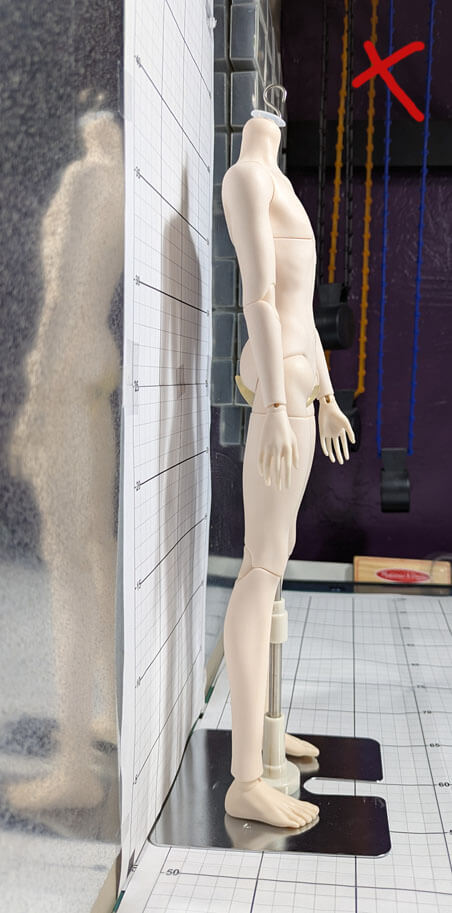
This body looks like it was 40cm. This means the subject was a) too far from the grid, or b) shot from slightly below. I did not use a tripod for these photos, which is why I recommend using one!
Camera & Doll Positioning
1. Position your camera correctly. The camera lens should be aimed at the doll's midpoint, which is halfway between the top of the head and the bottom of the feet. This is not necessarily the belly button, as BJDs can have different body proportions.
A simple way to check alignment is to tape a piece of string just below the camera lens. Gently stretch the string toward the doll and line it up with the doll's midpoint. If the string angles upward or downward, adjust the camera height until it is level.
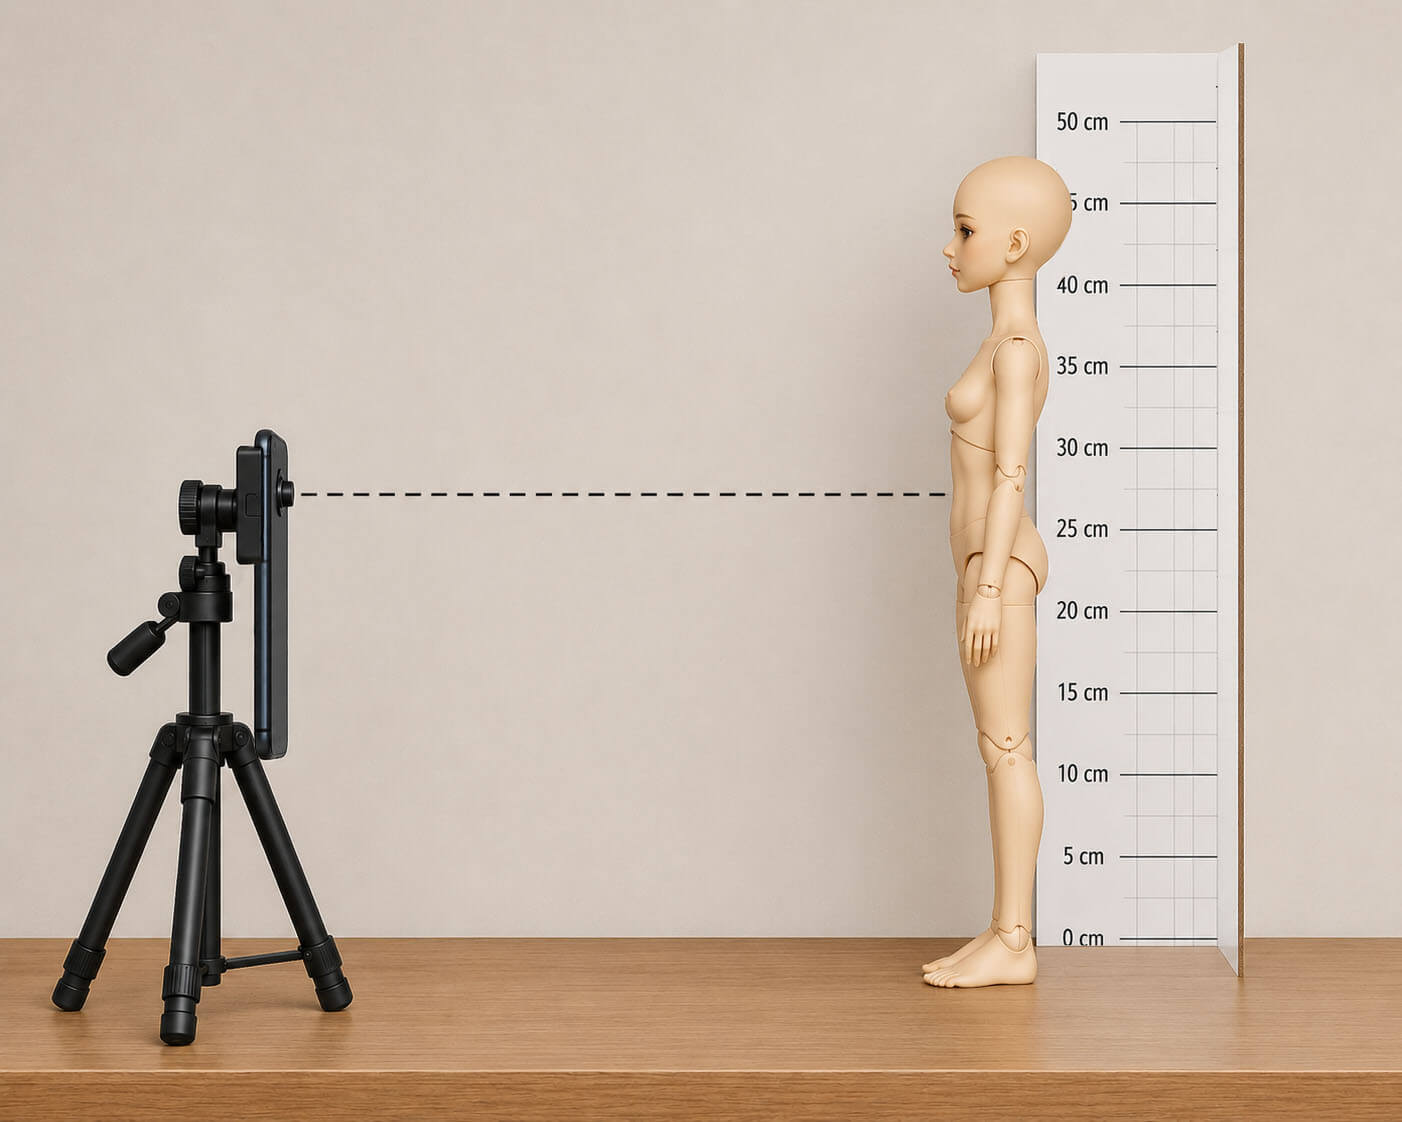
AI-generated for now, don't hate me. The real photo will come soon.
When taking your photos, try to stand at least 3 to 5 feet away (or more depending on the doll's size) from the doll. If you need a tighter shot, use your camera's zoom settings instead of physically stepping closer. Walking too close creates "lens distortion" (which gives the doll a subtle fisheye effect and warps the measurements), while stepping back and zooming keeps everything flatter and more accurate.
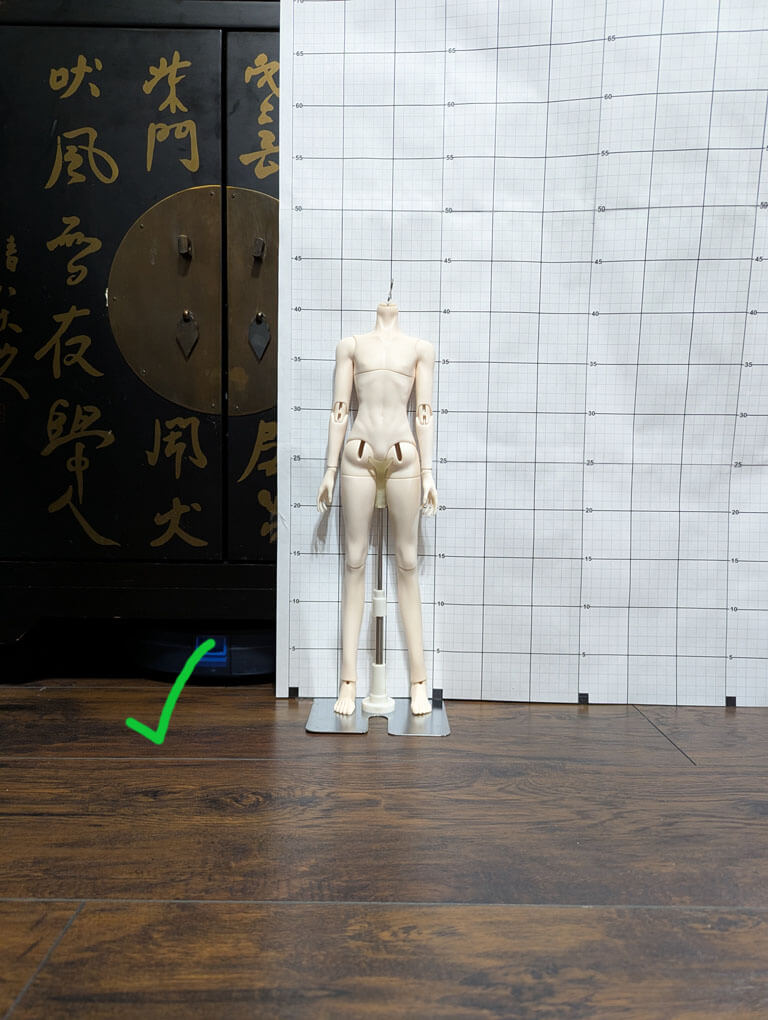
2. Take a front-view photo. Place the doll as close to the grid as possible and ensure it is standing as straight as possible. If your doll cannot stand on its own, you may photograph it from above while it is lying down. Camera positioning rules still apply.
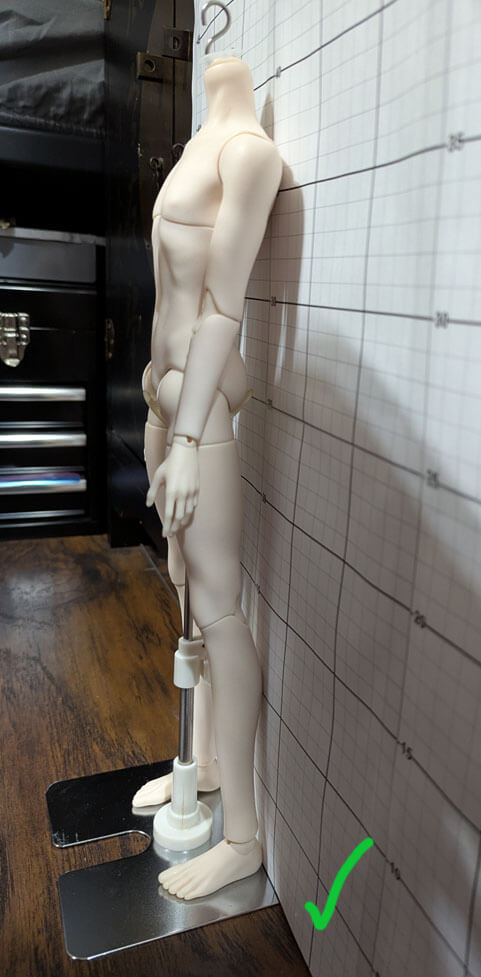
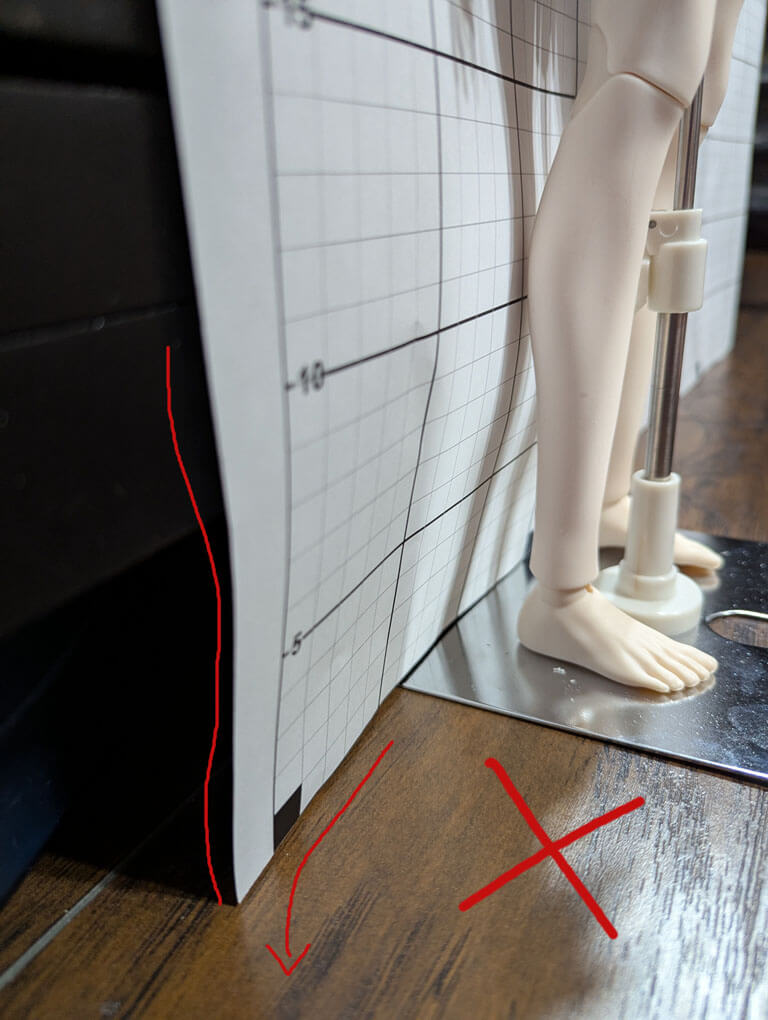
Note on doll stands: If at all possible, do not use a doll stand. However, you can try using the doll stand's base as your "table surface," or slide a thin metal base right underneath the grid paper. However, you will need to make sure the background is completely stable and straight, not flapping around or curling (see examples below). Test it out first to make sure everything stays level! Some dolls, like snake dolls, may need ot be laid flat on the floor. Use a sturdy stool or chair to take a picture from above, but try to keep the camera level and straight.
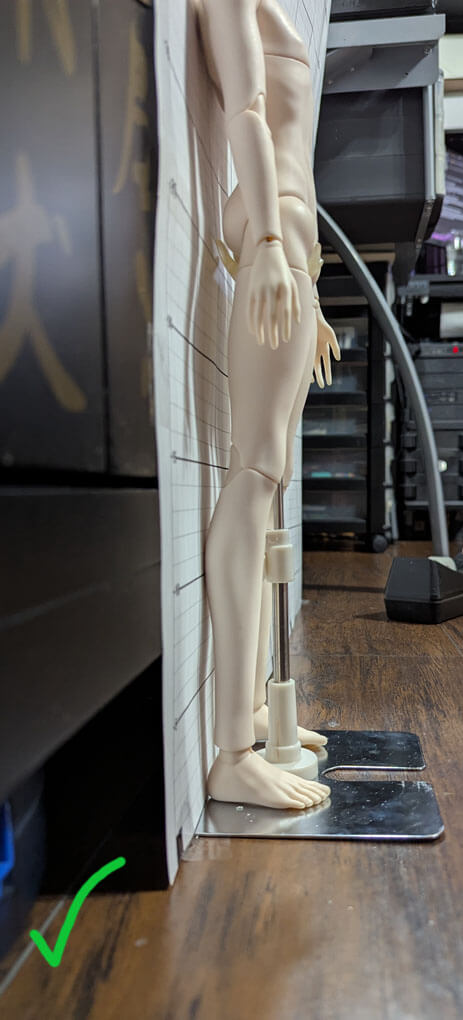
3. Take a side-view photo. Raise and bend the arm closest to the camera so the body's profile remains visible.
4. Take a back-view photo. Be sure to put the arm back down. 🙂
Editing & Watermarks
If you are not familiar with photo editing software, feel free to upload your photos as-is and leave a note in the notes section. I can crop and prepare them for the database. If you prefer, you may also send the files to me through a Discord private message. I understand that some people may not want uncropped photos of their home or workspace uploaded publicly to the internet. 🙂
If you would like a watermark added, include an email address, social media username, website, or other credit information in your note.
If you prefer to edit the photos yourself, that's perfectly fine. Just make sure any watermark or handwritten note does not obscure the measurements or grid markings. 🙂
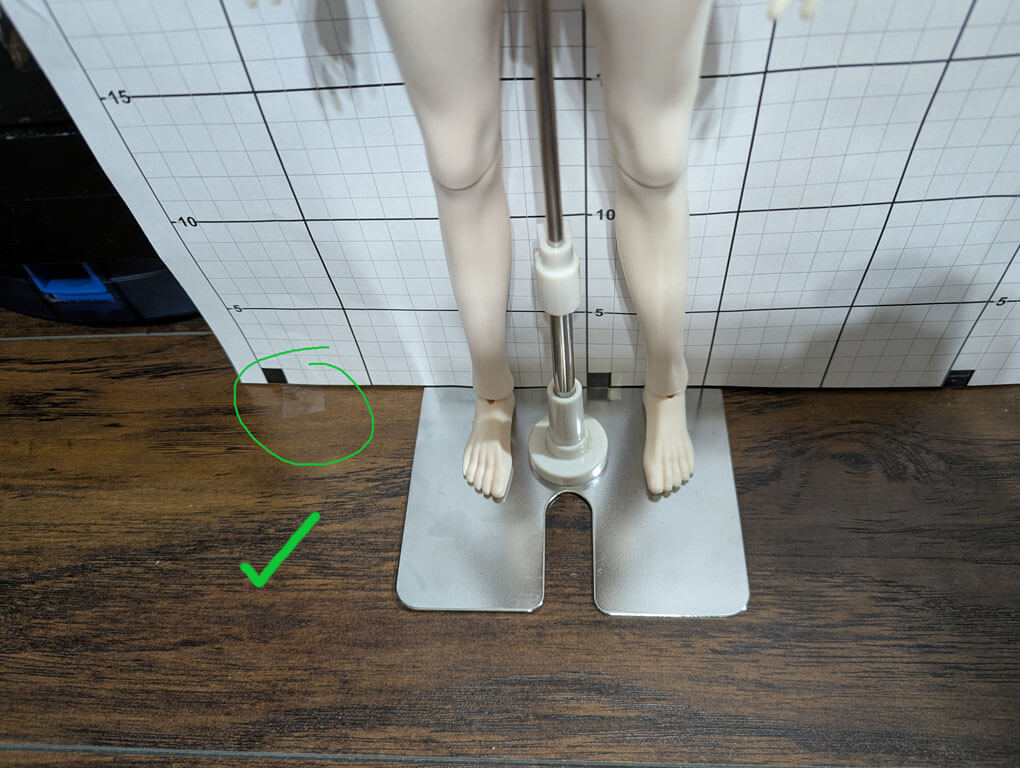
Doll stands cause the doll to stand too far away. In order to use one, you will need to slip the base underneath the paper.
You can use a cabinet or something similar that has a gap at the bottom to slip the base of the stand underneath so the doll and grid can sit flush with the cabinet.
The base of the doll stand is under the paper, and the bottom is flush with the bottom of the doll stand/feet.
Make sure the grid is straight and not puckered and curled.
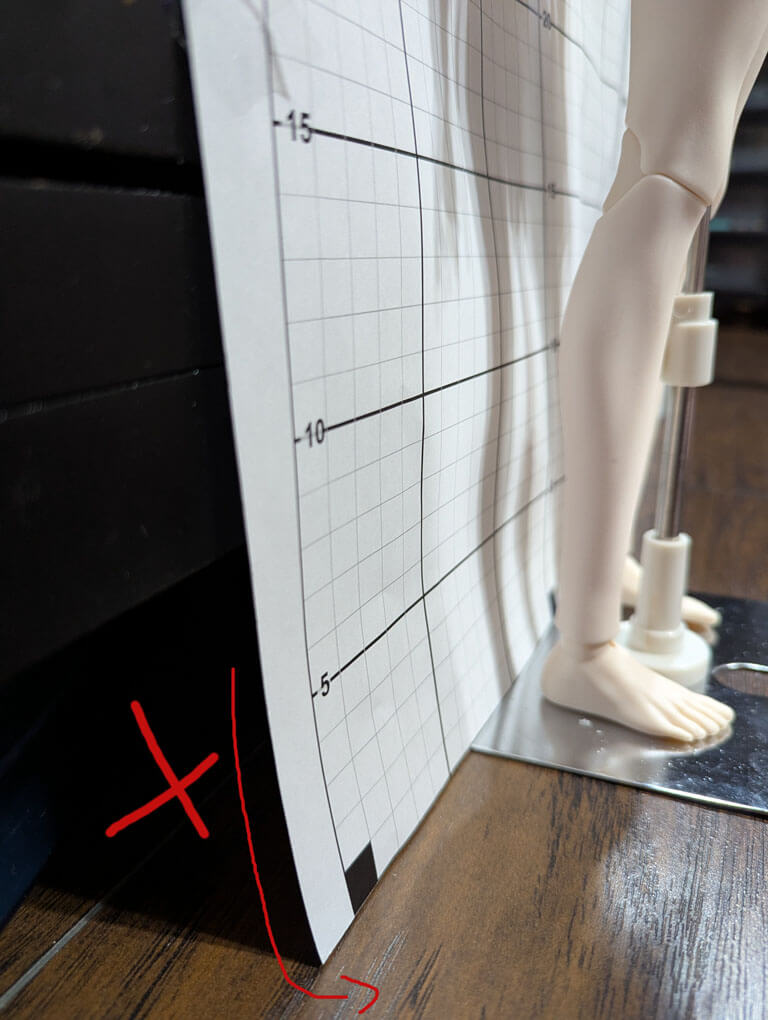
This is before I tape it. There was nothing to support the bottom of the paper so it was all over the place.
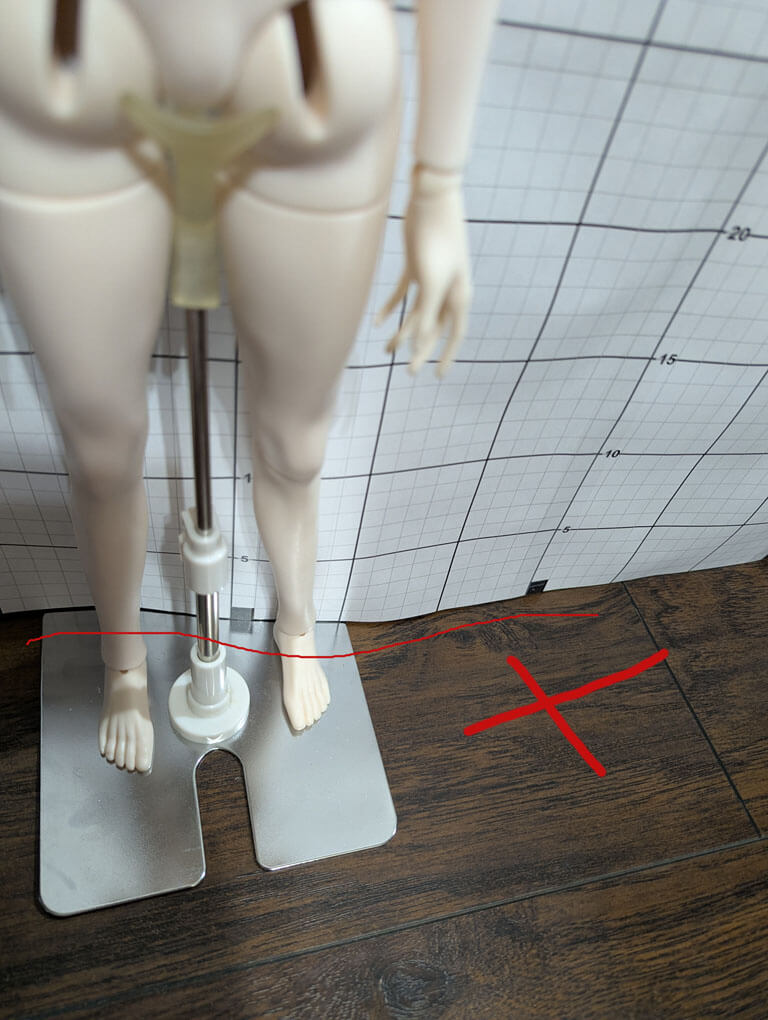
I taped the grid to a cabinet that had a gap at the bottom. I pulled it downward to make it taunt, then taped it to the floor to straighten it.
Now the bottom is straight, even though there is nothing behind it to support the paper. However, I failed to notice the pucket near his butt level. It's not bad, but I should fix it before taking a photo.
This is sort of what the photos should look like. The photos will be cropped and then uploaded. My camera was slightly tilted, but I could fix it in Photoshop.
Uploading your Photos
Now you’re ready to upload the photos you’ve taken. Click the upload button to begin, and be sure to follow the instructions for each section. If you have any questions, feel free to reach out through the contact form or via Discord.
Alternatively, you can show me your images on Discord before uploading to confirm they look correct.
Please note that photos may be rejected for a variety of reasons. If that happens, I will try to contact you.
Check the box if the doll is a hybrid. If not, leave it blank.
Please use TinyPNG or equivalent before uploading files!
Please be aware that I may need to straighten your photo if it's crooked or the perspective is off. I will not alter any watermarks or credits, as long as they are not harmful.